
How to Install a Level 2 EV Charger at Home: Step-by-Step
Installing a home EV charging station is one of the best upgrades for electric vehicle owners. If you want faster charging, better convenience, and lower long-term charging costs, learning how to Install a Level 2 EV Charger at Home is essential. While many homeowners hire a licensed electrician, understanding the installation process helps you make informed decisions, estimate costs, and choose the right equipment.
The guide below explains everything from electrical requirements to safety tips, installation steps, recommended chargers, and common mistakes.
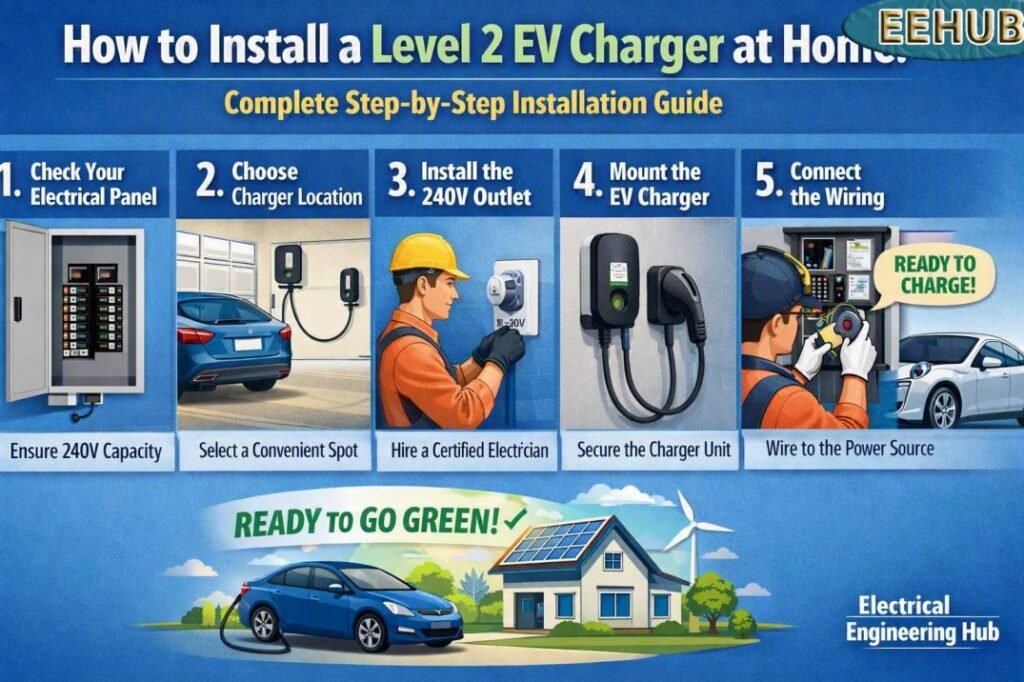
Table of Contents
Table of Contents
Quick Comparison Table
Choosing the right charger before installation makes the process much easier. The table below compares two popular Level 2 EV chargers available on Amazon.
| Feature | Emporia Level 2 EV Charger | EVIQO Level 2 EV Charger |
|---|---|---|
| Maximum Charging Speed | Up to 48A | Up to 48A |
| Installation | Hardwired or NEMA 14-50 | Hardwired Recommended |
| Smart App | Yes | Yes |
| Wi-Fi Connectivity | Yes | Yes |
| Energy Monitoring | Advanced | Basic |
| Indoor/Outdoor | Yes | Yes |
| Amazon Availability | Yes | Yes |
Before selecting a charger, compare the available features and installation requirements. You can also explore our complete guide on the best ev charger for home level 2 to find the ideal option for your vehicle and budget.
Why Install a Level 2 EV Charger at Home?
A Level 2 charger uses a 240V electrical circuit instead of the standard 120V household outlet. This significantly reduces charging time while improving efficiency.
Benefits include:
- Charge up to 9 times faster
- Convenient overnight charging
- Lower dependence on public charging stations
- Higher property value
- Better battery management
- Lower electricity costs with off-peak charging
Most modern electric vehicles fully support Level 2 charging, making it the preferred solution for daily use.
What You Need Before Installation
Before you Install a Level 2 EV Charger at Home, verify that your electrical system meets the required specifications.
| Requirement | Recommended Specification |
|---|---|
| Voltage | 240V |
| Breaker Size | 50A–60A |
| Wire Size | 6 AWG Copper (Typical) |
| Dedicated Circuit | Required |
| GFCI Protection | As Required by Local Code |
| Installation Location | Garage or Exterior Wall |
Your electrical panel should also have enough spare capacity to support an additional circuit.
How to Install a Level 2 EV Charger at Home: Step-by-Step
Step 1: Select the Installation Location
Choose a location close to where you usually park your EV.
The charger should:
- Reach your charging port comfortably
- Stay protected from physical damage
- Allow easy cable management
- Meet manufacturer clearance recommendations
Garage installation is generally the easiest option.
Step 2: Check Electrical Panel Capacity
Your home’s service panel must support the additional electrical load.
An electrician will inspect:
- Main breaker rating
- Available breaker space
- Existing electrical load
- Panel condition
Older homes may require a panel upgrade before installation.
Step 3: Install a Dedicated Circuit
A dedicated circuit prevents overloads and improves electrical safety.
Typical configurations include:
| Charger Output | Breaker Size |
|---|---|
| 32A | 40A |
| 40A | 50A |
| 48A | 60A |
Never connect multiple appliances to the EV charger circuit.
Step 4: Run Electrical Wiring
The electrician installs conduit and properly sized wiring between the electrical panel and charger location.
Common wiring methods include:
- EMT conduit
- PVC conduit
- Flexible metallic conduit (where permitted)
Wire size depends on:
- Current rating
- Installation distance
- Local electrical codes
- Voltage drop calculations
Step 5: Mount the Charger
Secure the charging unit firmly to the wall according to the manufacturer’s instructions.
Maintain sufficient height for comfortable operation and cable storage.
Step 6: Connect the Electrical Supply
After turning off power:
- Connect line conductors
- Connect ground wire
- Tighten terminals to specified torque
- Verify wiring polarity
Improper wiring may damage the charger.
Step 7: Configure Smart Features
Most modern chargers connect through Wi-Fi.
Setup typically includes:
- Downloading the mobile app
- Connecting to home Wi-Fi
- Creating an account
- Updating firmware
- Scheduling charging sessions
Smart scheduling helps reduce electricity costs during off-peak hours.
If you’re still comparing charging stations, don’t miss our in-depth roundup of the best ev charger for home level 2 to find the perfect smart charger for your home and electric vehicle.
Step 8: Test the Charger
After restoring power:
- Verify power indicator
- Plug in the vehicle
- Confirm charging starts correctly
- Monitor charging current
- Check for abnormal heating
If everything operates normally, the installation is complete.
Recommended Level 2 Chargers
Emporia Level 2 EV Charger
The Emporia charger is one of the highest-rated smart chargers available on Amazon.
Key features include:
- Up to 48A charging
- Wi-Fi connectivity
- Detailed energy monitoring
- Mobile scheduling
- Indoor and outdoor installation
- Excellent value for money
CTA
Upgrade your home charging experience with the Emporia Level 2 EV Charger. Check today’s Amazon price and customer reviews before purchasing.
EVIQO Level 2 EV Charger
EVIQO is another premium charger designed for homeowners seeking reliable high-speed charging.
Features include:
- Up to 48A charging
- Hardwired installation
- Smart mobile controls
- Durable weather-resistant enclosure
- Reliable long-term performance
CTA
Looking for premium charging performance? View the latest Amazon deals on the EVIQO Level 2 EV Charger and compare current pricing.
Hardwired vs Plug-In Installation
| Feature | Hardwired | Plug-In |
|---|---|---|
| Maximum Output | Up to 48A | Usually 40A |
| Safety | Excellent | Very Good |
| Portability | No | Yes |
| Installation Cost | Slightly Higher | Lower |
| Recommended | Yes | Suitable for renters |
Hardwired installations are generally preferred because they support higher charging speeds and provide better long-term reliability.
Safety Tips
Always follow these important safety recommendations:
- Use a licensed electrician whenever required.
- Never overload electrical circuits.
- Follow National Electrical Code (NEC) requirements.
- Use the correct breaker size.
- Install proper grounding.
- Inspect cables regularly.
- Protect outdoor installations from water intrusion.
Electrical safety should always take priority over installation cost.
Typical Installation Cost
Installation expenses vary depending on electrical work required.
| Installation Item | Typical Cost |
|---|---|
| Basic Installation | $500–$900 |
| Electrical Panel Upgrade | $1,500–$4,000 |
| Wiring and Conduit | $150–$600 |
| Permit Fees | $50–$300 |
Complex installations with long cable runs usually cost more.
Common Installation Mistakes
Avoid these frequent errors:
- Selecting the wrong breaker size
- Using undersized wire
- Ignoring local permit requirements
- Installing the charger too far from the parking location
- Skipping electrical load calculations
- Poor cable management
- Buying a charger that exceeds panel capacity
Planning ahead saves money and prevents future electrical issues.
Which Homeowners Can Install Their Own Charger?
Some jurisdictions allow homeowners to perform electrical work after obtaining permits. However, many areas require installation by a licensed electrician.
Hiring a professional provides:
- Code-compliant installation
- Warranty protection
- Safe electrical connections
- Proper inspection
- Insurance compliance
For most homeowners, professional installation remains the safest choice.
Choosing the Best Charger Before Installation
Not every charger offers the same features. Compare charging speed, smart controls, weather resistance, installation type, warranty, and energy monitoring before making a purchase.
Our detailed guide on the best ev charger for home level 2 compares the leading models to help you choose the right charger for your needs.
Final Thoughts
Learning how to Install a Level 2 EV Charger at Home helps you understand the electrical requirements, installation process, safety standards, and expected costs before beginning your project. Whether you choose the feature-rich Emporia charger or the premium EVIQO model, a professionally installed Level 2 charger provides faster charging, greater convenience, and long-term value.
Frequently Asked Questions
1. Can I Install a Level 2 EV Charger at Home myself?
Some locations allow homeowners to install their own charger, but many jurisdictions require a licensed electrician. Always check local electrical codes before starting.
2. What breaker size is required for a Level 2 charger?
Most 48A chargers require a 60A dedicated breaker, while 40A chargers typically use a 50A breaker.
3. How long does installation take?
A standard installation usually takes between 2 and 6 hours. More complex projects involving panel upgrades may require a full day or longer.
4. Is a hardwired charger better than a plug-in charger?
Yes. Hardwired chargers generally provide higher charging capacity, improved reliability, and better long-term performance.
5. Which Level 2 EV charger is best for home use?
Both the Emporia Level 2 EV Charger and the EVIQO Level 2 EV Charger are excellent choices available on Amazon. Your final decision depends on your preferred features, budget, and installation requirements.
Related Guides
- EVIQO Level 2 EV Charger Review
- Grizzl E Level 2 EV Charger Review
- Emporia EV Charger Review
- Hardwired vs Plug In EV Charger
- Level 1 vs Level 2 EV Charger
- Best EVSE Level 2 Charger
- Best EV Charger Under $300
Get new guides in your feed. Follow Electrical Insights on LinkedIn for new electrical standards guides, calculators and design tips from Azad Circuit Hub.
Level2EVChargerInstallation, #EVChargerInstallation, #HomeEVCharger, #ElectricVehicleCharging, #EVChargingGuide, #Level2Charger, #HomeElectrical, #EVChargingStation, #ElectricianTips, #EVOwners
