Stepper Motor Position Control with Arduino: Best Guide
Arduino stepper motor position control is a popular and useful application of the Arduino platform, allowing for accurate control of stepper motor movement in a variety of projects.
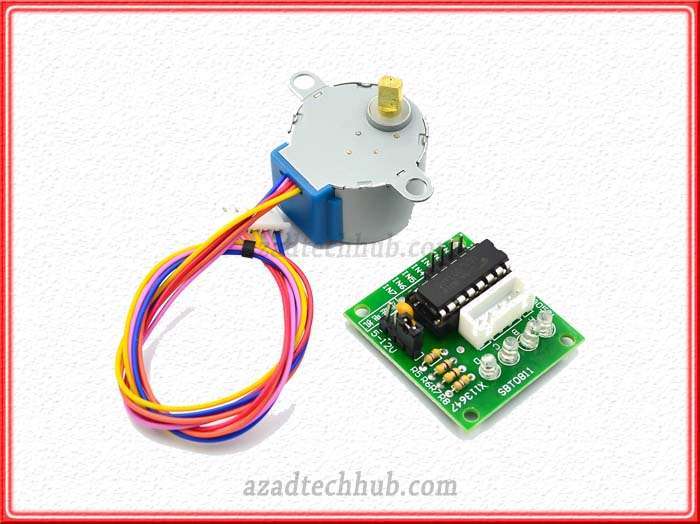
Read More About
Stepper motors are widely used in various applications that require precise and controlled motion. Unlike DC motors, stepper motors move in discrete steps, allowing for accurate positioning. Each step corresponds to a fixed angular displacement, making them suitable for applications such as robotics, 3D printers, CNC machines, and automated systems.
Position control in stepper motors refers to the ability to accurately control and maintain the motor’s position. This control is achieved by commanding the motor to move a specific number of steps in a particular direction. By precisely controlling the number of steps and the timing of the pulses sent to the motor, the desired position can be achieved.
Importance of accurate position control in stepper motor applications
Accurate position control is crucial in stepper motor applications for several reasons:
Precision: Stepper motors offer high positioning accuracy, allowing for precise control over the motor’s movement. This is vital in applications that require fine adjustments or exact positioning.
Repeatability: Stepper motors can reliably reproduce the same movement repeatedly, ensuring consistent performance and predictable results. This is especially important in tasks that require repetitive motion, such as CNC machining or pick-and-place operations.
Stability: By maintaining precise position control, stepper motors provide stability and prevent drift or deviation from the desired position. This stability is critical in applications where positional accuracy is essential for overall system performance and functionality.
Synchronization: Stepper motors can be synchronized across multiple axes, enabling coordinated motion control. This capability is beneficial in applications that involve complex movements or require simultaneous control of multiple motors.
In Arduino-based projects, achieving accurate position control with stepper motors opens up a wide range of possibilities. By leveraging the capabilities of Arduino boards and appropriate control algorithms, you can develop systems that precisely position motors for various applications.
In the following sections, we will delve into the principles, implementation, and advanced techniques of Arduino Stepper Motor Position Control to equip you with the knowledge and skills needed to harness the full potential of stepper motors in your projects.
Principles of Arduino Stepper Motor Position Control
Stepper motors move in discrete steps, where each step corresponds to a specific angular displacement. The number of steps per revolution depends on the motor’s design and can vary widely. For example, a common stepper motor may have 200 steps per revolution, meaning it takes 200 steps to complete one full rotation.
To achieve precise positioning, it is important to consider the step angle and step modes of the stepper motor. The step angle determines the smallest possible rotation that can be achieved. Smaller step angles result in finer position control.
In addition to the step angle, stepper motors often support different step modes, such as full step, half step, and micro stepping. In full step mode, the motor moves one step at a time, corresponding to the step angle. Half step mode alternates between a full step and half step, effectively doubling the motor’s resolution.
Micro stepping in Arduino Stepper Motor Position Control
Micro stepping takes precision to the next level by dividing each step into smaller subdivisions. This is achieved by controlling the current flowing through the motor’s coils in a sinusoidal pattern. Micro stepping can provide smoother motion and finer control, enabling more precise positioning.
Microstepping is particularly useful when aiming for smoother motion and finer control in stepper motor applications. By dividing each step into smaller subdivisions, microstepping reduces vibration and noise while increasing the resolution of position control.
Microstepping is achieved through specialized stepper motor drivers that can generate intermediate current levels between the full-step positions. These drivers modulate the current in a way that produces a smooth sinusoidal waveform, resulting in more precise control over the motor’s position.
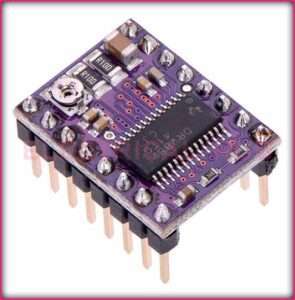
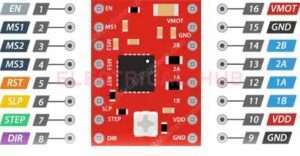
Arduino-based stepper motor drivers, such as the A4988 or DRV8825, commonly support microstepping. By configuring the driver and using appropriate libraries, you can take advantage of microstepping capabilities to achieve smoother and more accurate motion control.
Understanding the principles of stepper motor steps, step angles, and step modes is essential for achieving precise position control. By leveraging micro stepping and utilizing appropriate stepper motor drivers. You can enhance the smoothness and precision of your stepper motor projects, opening up possibilities for applications that require high-accuracy positioning.
In the next sections, we will delve into the control aspects of Arduino Stepper Motor Position Control. Including the connection and configuration of the stepper motor drivers. As well as the development of control algorithms and code to achieve accurate position control with Arduino.
Arduino Control of Stepper Motor Position
Arduino boards offer a powerful platform for controlling stepper motors and achieving precise position control. With their digital I/O pins and support for external libraries, Arduino boards can generate the necessary signals to drive stepper motor drivers and control the motor’s position.
To control the position of a stepper motor using Arduino, you need to select a compatible stepper motor and a suitable stepper motor driver. The motor and driver should be matched in terms of voltage and current ratings. The motor driver acts as an interface between the Arduino and the motor, providing the necessary power and control signals.
Wiring the stepper motor to the driver and connecting the driver to the Arduino is a critical step. Proper wiring ensures that the signals from the Arduino are correctly transmitted to the motor, allowing for accurate position control. Consult the datasheets and documentation of your specific motor and driver for guidance on the wiring connections.
Introduction to position control algorithms (open-loop and closed-loop)
Position control algorithms determine how the Arduino commands the stepper motor to move and maintain its position. There are two main types of position control algorithms: open-loop and closed-loop.
In open-loop control, the Arduino sends a predetermined number of steps to the motor, assuming that each step corresponds to a fixed displacement. This method is suitable for applications where positional accuracy is not critical, and the motor operates under predictable conditions.
Closed-loop control, on the other hand, involves using feedback from sensors to monitor the motor’s actual position and adjust the commanded steps accordingly. This approach provides more accurate position control, compensating for factors like motor inaccuracies and external disturbances.
Writing code for position control using Arduino and appropriate libraries
To achieve position control with Arduino, you need to write code that communicates with the stepper motor driver and controls the motor’s movement. Arduino provides a user-friendly Integrated Development Environment (IDE) that allows you to write and upload code to the Arduino board.
Additionally, there are several libraries available, such as the AccelStepper library, that simplify the process of controlling stepper motors. These libraries provide functions and methods to handle motor movements, acceleration profiles, and position control.
By utilizing the appropriate libraries and implementing the necessary control logic in your code, you can command the stepper motor to move to specific positions, adjust its speed and acceleration, and achieve precise position control.
In the next section, we will explore practical Arduino Stepper Motor Position Control projects that demonstrate the application of these principles and techniques in real-world scenarios.
Implementing Stepper Motor Position Control with Arduino
A. Setting up the hardware and wiring connections
To implement stepper motor position control with Arduino, start by setting up the necessary hardware components. This includes selecting a compatible stepper motor and driver, as well as ensuring the proper power supply for the motor and Arduino.
Once you have the components, carefully wire the stepper motor to the driver and the driver to the Arduino. Follow the datasheets and documentation of your specific motor and driver for accurate wiring instructions. Pay attention to the connection of motor phases, power supply, and control signals.
B. Configuring the Arduino IDE and required libraries
Next, configure the Arduino IDE to work with your Arduino board. Install the necessary board definitions and drivers if required. This enables you to upload code to the Arduino board seamlessly.
Additionally, identify and install the relevant libraries for stepper motor control. Libraries such as the AccelStepper library or the Stepper library provide pre-built functions and methods that simplify stepper motor control. Install these libraries through the Arduino Library Manager or by manually downloading and adding them to your project.
C. Developing the control logic and algorithm for position control
With the hardware set up and the libraries installed, it’s time to develop the control logic and algorithm for stepper motor position control. Determine whether you will be using open-loop or closed-loop control based on your application requirements.
For open-loop control, write code that calculates the number of steps required to reach the desired position and send the appropriate commands to the motor driver. Implement acceleration and deceleration profiles to ensure smooth and controlled movement.
For closed-loop control, incorporate feedback from sensors, such as encoders or limit switches, to monitor the motor’s actual position. Adjust the commanded steps based on the feedback received to maintain accurate position control. Consider implementing PID control or other control algorithms to enhance the system’s performance.
D. Testing and refining the position control system
Once the code is developed, upload it to the Arduino board and begin testing the position control system. Verify that the motor moves to the desired positions accurately and reliably. Monitor the motor’s behavior and make adjustments to the control logic and algorithm as needed.
During testing, pay attention to factors such as speed, acceleration, and positional accuracy. Refine the control parameters and fine-tune the code to optimize the performance of the position control system.
Iterate through the testing and refinement process until the desired level of position control is achieved. Document the final code and system configuration for future reference.
By following these steps and carefully implementing the control logic, you can successfully achieve stepper motor position control using Arduino. The next section will provide further insights and recommendations for advanced techniques and additional exploration in Arduino Stepper Motor Position Control projects.
Advanced Techniques and Applications of Stepper Motor Position Control
A. Sensor-based position feedback for closed-loop control
Sensor-based position feedback plays a crucial role in achieving accurate and reliable closed-loop control of stepper motors. By integrating sensors such as encoders or limit switches, you can obtain real-time feedback on the motor’s position and make precise adjustments to achieve the desired position.
Implementing closed-loop control with position feedback involves continuously monitoring the sensor data and comparing it with the target position. Using this feedback, the Arduino can dynamically adjust the commanded steps to compensate for any deviations and maintain accurate position control.
B. Implementing acceleration and deceleration profiles for smooth motion
Smooth motion is essential for many stepper motor applications. By implementing acceleration and deceleration profiles, you can achieve gradual changes in speed, preventing sudden jerks or overshoots during motor movement.
Arduino provides libraries like the AccelStepper library, which simplifies the implementation of acceleration and deceleration profiles. By specifying the desired acceleration and maximum speed, the library automatically generates smooth motion profiles, ensuring precise and controlled position control.
C. Multi-axis position synchronization and coordinated motion control
In some applications, multiple stepper motors need to work together in a synchronized manner. This can be achieved through coordinated motion control, where the Arduino orchestrates the movements of multiple stepper motors to maintain precise position relationships between them.
By using appropriate control algorithms and communication protocols, such as I2C or serial communication, you can synchronize the movements of multiple stepper motors. This enables applications like robotics, CNC machines, or 3D printers to achieve complex and coordinated motions with accurate position control.
D. Real-time position control using interrupts and timers
For time-sensitive applications or tasks that require precise timing, real-time position control can be accomplished using interrupts and timers in Arduino. Interrupts allow the Arduino to respond promptly to external events, while timers provide accurate timing for controlling the stepper motor’s position.
By utilizing interrupts and timers, you can ensure that position control commands are executed precisely and on time. This is particularly useful in applications where precise timing is critical, such as in industrial automation or motion control systems.
By incorporating these advanced techniques into your Arduino Stepper Motor Position Control projects, you can enhance the accuracy, smoothness, and versatility of your stepper motor applications.
Conclusion
In this guide, we explored the principles, techniques, and applications of Arduino Stepper Motor Position Control. We learned about the importance of accurate position control, the principles of stepper motor steps and rotation, and the significance of microstepping for finer control.
Then, we discussed the implementation of position control with Arduino, including hardware setup, code development, and testing. We also delved into advanced techniques such as sensor-based feedback, acceleration profiles, multi-axis synchronization, and real-time control.
To further explore Arduino Stepper Motor Position Control, consider experimenting with different control algorithms, integrating additional sensors for more precise feedback, or expanding your projects to incorporate complex motion sequences. The Arduino community offers a wealth of resources, libraries, and project ideas to inspire your creativity.
Remember, Arduino Stepper Motor Position Control opens up a world of possibilities in various fields, including robotics, automation, precision machining, and more. Embrace experimentation, refine your skills, and let your imagination guide you to create innovative projects that leverage the power of Arduino and stepper motors for accurate and controlled position control.
Subscribe to our Newsletter “Electrical Insights Daily” to get the latest updates in Electrical Engineering. You can also Follow us on LinkedIn and Facebook to see our latest posts on Electrical Engineering Topics.

I am not sure where you are getting your information, but good topic. I needs to spend some time learning more or understanding more. Thanks for excellent information I was looking for this information for my mission.