Busbar Bending Calculation Made Easy — Avoid Costly Fabrication Errors with Accurate Engineering Method
Busbar bending calculation is one of the most practical skills required during panel manufacturing and switchgear assembly. Even experienced technicians can waste copper or aluminum if the bend allowance is estimated without proper engineering logic. A small error in measurement may lead to misalignment with terminals, excessive mechanical stress, or costly rework. When the bending dimensions are calculated correctly before fabrication, installation becomes faster, connections remain reliable, and material utilization improves significantly.
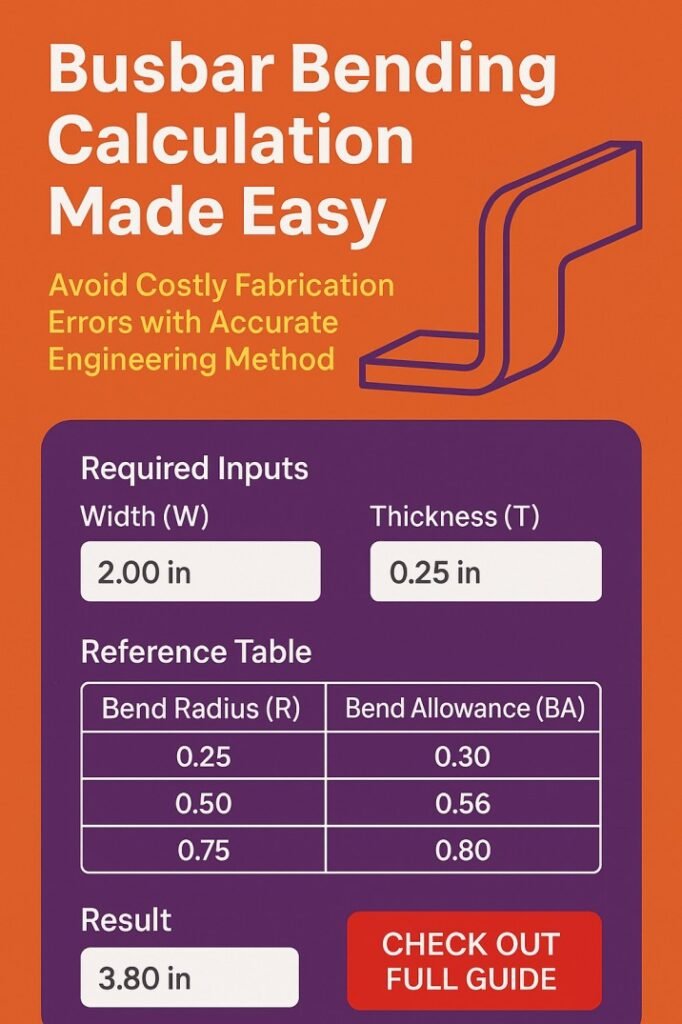
Table of Contents
Why Accurate Busbar Bending Matters in Panel Fabrication
In any low-voltage or medium-voltage panel, busbars carry high current and must maintain both electrical and mechanical integrity. Incorrect bending creates localized stress points that may cause cracks over time, especially when vibration or thermal expansion is present. An accurate busbar bending calculation ensures the final length after bending matches the layout drawing, allowing proper spacing, insulation clearance, and terminal alignment.
Fabricators often rely on rule-of-thumb values for bend allowance. While that may work for repeated designs, modern panels vary in current rating, copper thickness, and installation geometry. A calculation-based approach removes guesswork and ensures consistency across projects. This also reduces copper wastage, which directly impacts project cost.
Find out more about iec 61439 busbar clearance
Understanding the Geometry Behind Busbar Bending
Every busbar bend changes the effective length of the conductor. When a flat bar is bent, the inner radius compresses and the outer radius stretches. The neutral axis, located somewhere within the thickness, maintains its original length. The goal of busbar bending calculation is to determine how much additional length must be considered before bending so that the finished shape matches the required dimensions.
Key geometric elements involved include:
- Bend angle
- Inside bend radius
- Busbar thickness
- Leg length before and after the bend
The relationship between these factors defines the bend allowance. For most copper busbars, the neutral axis is typically assumed around 0.4 to 0.5 times the thickness from the inner surface. Using this practical assumption provides accurate results for standard switchgear fabrication. Get complete information about iec standard for busbar sizing
Basic Formula Used for Busbar Bending Calculation
A commonly used engineering formula for bend allowance is:
Bend Allowance = (π × (R + K × T) × Angle) / 180
Where:
- R = Inside bend radius
- T = Busbar thickness
- K = Neutral axis factor (usually 0.4 to 0.5)
- Angle = Bend angle in degrees
This formula calculates the developed length consumed during bending. The calculated value must be added to the straight leg dimensions when preparing the cutting length.
Example Calculation for Practical Understanding
Consider a copper busbar with the following parameters:
| Parameter | Value |
|---|---|
| Busbar Thickness | 10 mm |
| Inside Bend Radius | 15 mm |
| Bend Angle | 90° |
| Neutral Axis Factor (K) | 0.45 |
Applying the busbar bending calculation:
Bend Allowance = (3.1416 × (15 + 0.45 × 10) × 90) / 180
Bend Allowance ≈ 30.6 mm
Read in detail about iec 61439 busbar calculation
This means approximately 30.6 mm of material length is consumed in the bend zone. If each straight leg is 150 mm, the total cutting length becomes:
Total Length = 150 + 150 + 30.6 = 330.6 mm
Using this approach ensures the finished busbar aligns perfectly with mounting points.
Recommended Minimum Bend Radius for Common Busbar Materials
Selecting the correct bend radius is equally important during busbar bending calculation. If the radius is too small, cracks or surface damage may occur.
| Material | Recommended Minimum Bend Radius |
|---|---|
| Copper (Annealed) | 1 × Thickness |
| Copper (Hard Drawn) | 2 × Thickness |
| Aluminum | 2 to 3 × Thickness |
Following these guidelines prevents structural weakness and maintains conductivity. Know more about IEC Standard for Busbar Clearance
Step-by-Step Field Method Used by Panel Builders
Although software tools exist, many fabrication shops still rely on manual measurement. A practical workflow includes measuring the required centerline dimensions from the layout drawing, identifying bend positions, calculating bend allowance, and marking the bar accordingly.
First, determine the finished dimensions between connection holes. Next, calculate the bend allowance using the selected radius and thickness. Then add this allowance to the straight sections to find the cutting length. Finally, mark the bending line considering the setback distance so the finished geometry matches the design.
This structured method improves repeatability across multiple panels and reduces trial-and-error adjustments.
Bend Deduction and Setback Considerations
Besides bend allowance, engineers sometimes use bend deduction or setback values. Bend deduction subtracts the excess length added by measuring outer dimensions, while setback represents the distance from the bend tangent point to the intersection of legs. Find out more about contact resistance test acceptable value for busbar
These relationships help when dimensions are provided from the outer edges of the busbar. Accurate busbar bending calculation often combines allowance and setback to match workshop measurement practices.
| Term | Purpose |
|---|---|
| Bend Allowance | Length consumed within the bend |
| Bend Deduction | Adjustment when outer dimensions are known |
| Setback | Distance used to locate bend line accurately |
Understanding when to apply each term prevents dimensional mismatch after bending.
Common Fabrication Mistakes and How Calculation Prevents Them
Several frequent errors occur during busbar forming. One major issue is ignoring material thickness while marking bend lines. Another is using a fixed bend radius regardless of current rating or material type. Some technicians also measure only straight legs and forget to include bend allowance.
Applying a consistent busbar bending calculation eliminates these problems. The calculated length ensures the finished part fits without forcing terminals or applying mechanical stress. This also maintains proper phase spacing and insulation clearance, which is essential for safe panel operation.
Find out more about Busbar Size Calculator – Accurate Sizing According to IEC and NEC Standards
Tools That Improve Accuracy in Workshop Conditions
Accurate bending depends not only on calculations but also on proper tooling. Hydraulic busbar benders with calibrated dies provide repeatable radii. Digital angle gauges help achieve precise bend angles. Measuring tapes with millimeter accuracy reduce marking errors.
Using templates for frequently manufactured panel ratings can further streamline production. Once the correct busbar bending calculation is validated for a design, the template ensures identical results across multiple units.
Quality Checks After Completing the Bend
After fabrication, the busbar should be checked against the panel layout drawing. Verify hole alignment, center-to-center distances, and phase spacing. Inspect the bend area for surface cracks or deformation. A properly executed busbar bending calculation results in minimal deviation from design dimensions.
Resistance measurement across the bend area can also confirm that the conductor integrity remains intact. Smooth edges and uniform radius indicate that the mechanical stress is within acceptable limits. Find out more about High Impedance Busbar Protection Explained with Example Calculations
Practical Tips for Engineers and Technicians
Maintaining a standard calculation sheet for different busbar sizes can save time on repetitive jobs. Recording actual bend results helps refine the neutral axis factor used in future busbar bending calculation tasks. Always match the bend radius with manufacturer recommendations for copper or aluminum bars.
During high current applications, ensure that the bending process does not reduce the effective cross-section. Proper deburring and surface finishing improve both electrical performance and insulation life.
Find out more about Busbar Stability Test Procedure – Step-by-Step Method to Ensure Safe and Reliable Busbars
Conclusion
Busbar bending calculation is not just a theoretical exercise; it directly affects fabrication accuracy, installation speed, and long-term reliability of electrical panels. By applying a consistent engineering method that accounts for thickness, bend radius, and angle, technicians can avoid costly material waste and alignment issues. Accurate measurements combined with proper tooling produce busbars that fit perfectly on the first attempt. Adopting this disciplined approach strengthens quality control, reduces rework, and ensures that every fabricated conductor meets both mechanical and electrical performance expectations.
Follow Us on Social:
Subscribe our Newsletter on Electrical Insights for latest updates from Electrical Engineering Hub
#BusbarBendingCalculation, #BusbarDesign, #ElectricalEngineering, #PanelDesign, #CopperBusbar, #SwitchgearDesign, #ElectricalCalculations, #PowerDistribution, #BusbarFabrication, #ElectricalStandards

