DC Dimmer Circuit: A Comprehensive Guide
A DC dimmer circuit allows you to control the brightness of a light or adjust the speed of a motor in direct current (DC) applications. Unlike AC dimmers that work with alternating current, DC dimmers specifically adjust the voltage in DC circuits, making them ideal for applications like LED lighting and motor control. In this guide, we’ll discuss how DC dimmer circuits work, the components involved, and their various applications. We’ll also explore thyristor dimmers, 12V and 220V DC dimmers, triac dimmers, and essential circuit components.
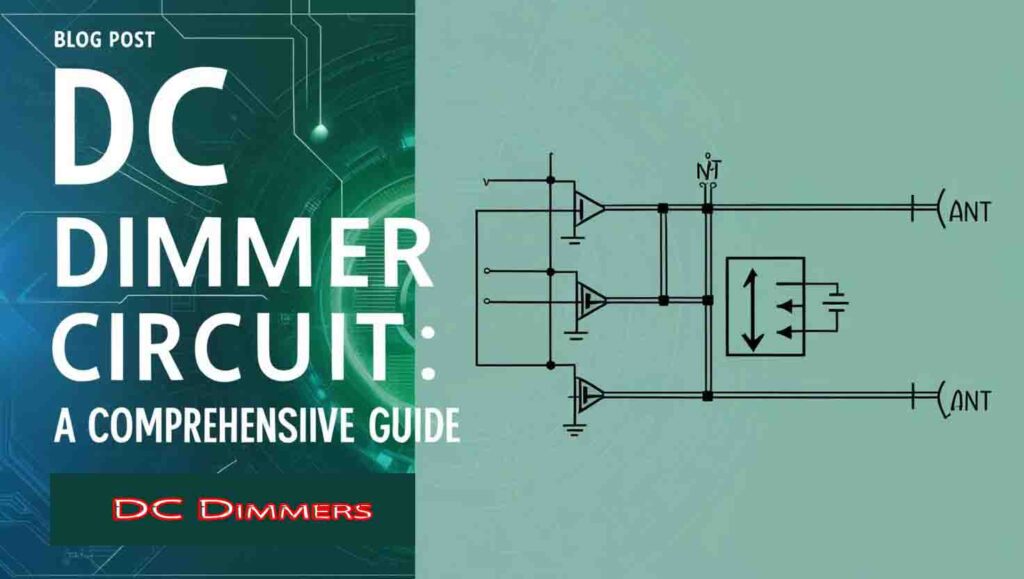
Table of Contents
What is a DC Dimmer Circuit?
A DC dimmer circuit adjusts the DC voltage supplied to a load, which helps in dimming the lights or controlling the speed of a motor. DC dimmers operate by modulating the DC power, commonly through pulse-width modulation (PWM), providing a more stable and efficient power control option. DC dimmer circuits are especially useful in low-voltage applications such as 12V DC lighting systems, making them popular for automotive lighting and various home electronics.
How Does a DC Dimmer Circuit Work?
DC dimmer circuits work by adjusting the average voltage reaching the load. For example, in a PWM-based DC dimmer, the circuit switches the power on and off rapidly, creating an effective change in power supplied to the device. This modulation allows you to reduce or increase brightness in lighting applications or adjust speed in motors without producing excessive heat, which is a common issue in resistive dimming methods.
Key Components in DC Dimmer Circuits
- Thyristors – In certain DC dimmers, thyristors act as the main switching component, controlling the current flow.
- Transistors or MOSFETs – These are used in PWM circuits for fast switching and efficient control.
- Capacitors and Resistors – For filtering and adjusting timing within the dimmer circuit.
- Potentiometer – Provides the manual control for adjusting brightness or speed in the circuit.
Types of DC Dimmer Circuits
1. Thyristor Dimmer Circuit
A thyristor dimmer circuit uses a thyristor to control the flow of DC current to the load. The thyristor acts as a gatekeeper, allowing current to flow only when triggered, making it suitable for high-power applications. Thyristor dimming circuits are more commonly used in industrial lighting systems, where higher currents are managed safely.
2. 220V Dimmer Circuit
A 220V dimmer circuit is less common for DC applications, as 220V typically refers to AC household voltage. However, for high-powered DC systems or battery banks, 220V DC dimmers may be used. These circuits often require heavy-duty components such as larger thyristors or transistors to handle the increased power.
3. 12V Dimmer Circuit
The 12V dimmer circuit is among the most widely used for DC applications, particularly in automotive lighting, RVs, and small home projects. These dimmers are compact, energy-efficient, and ideal for controlling LED strips or small DC motors. A 12V dimmer switch provides easy manual adjustment and can often be integrated with other smart control systems, such as Zigbee or Bluetooth.
How to Set Up a DC Dimmer Circuit
Step-by-Step Guide
- Choose Your Components – Select appropriate components, including a transistor (or thyristor if dealing with high currents), resistors, and a potentiometer.
- Assemble the Circuit – Connect your transistor or thyristor in series with the load, typically a light or motor. The potentiometer will control the voltage by varying the input to the transistor.
- Connect the Power Source – Connect a 12V DC power source (or another appropriate voltage) to power the dimmer circuit.
- Test the Circuit – Adjust the potentiometer and observe how the brightness or motor speed changes.
Important Considerations
- Power Rating: Ensure all components, especially the thyristor or transistor, can handle the load’s power requirements.
- Heat Dissipation: Use heatsinks if needed, particularly for high-power dimmer circuits.
- Circuit Protection: Adding a fuse or breaker in the circuit can help protect against short circuits or overloads.
Understanding Thyristor-Based DC Dimming
Thyristor dimming works by using thyristors as the control element. When applied in a DC voltage dimmer, the thyristor allows for fine control of current to the load. This is useful for creating a thyristor light dimmer that can control a large DC load efficiently. Thyristor dimming circuits are stable and provide high-power control, making them ideal for commercial lighting and motor speed control applications.
How Does a Thyristor Dimmer Work?
In a thyristor dimmer, the thyristor remains in an off state until triggered by a control signal, after which it allows current to pass through the load. By adjusting the control signal timing, the user can regulate the power output.
DC Dimmer Circuit Applications
- Automotive Lighting: 12V dimmer circuits are perfect for automotive LED lights.
- Home Automation: Used in conjunction with smart switches and Zigbee systems for lighting control.
- Industrial Control: Thyristor dimmers in DC motor speed control for machines or conveyor belts.
- Solar Power Systems: Adjust lighting and motor applications powered by solar panels.
DC Dimmer Circuit Using Transistor BC547
The BC547 transistor is a popular choice for low-power DC dimmer circuits due to its low cost and easy availability. This small-signal NPN transistor works well for controlling light intensity in LEDs or adjusting motor speeds in DC circuits operating at low currents, making it ideal for small DIY projects or beginner electronics.
How the DC Dimmer Circuit Works
In this DC dimmer circuit, the BC547 transistor acts as a switch and amplifier, allowing you to control the voltage supplied to a load, such as an LED or small DC motor. By adjusting the voltage at the transistor’s base through a potentiometer, you can vary the amount of current flowing to the load, which changes the brightness of the light or the speed of the motor.
Components Needed
- BC547 Transistor (NPN)
- Potentiometer (10kΩ) – Controls the dimming
- Resistor (1kΩ) – Limits current to the base of the transistor
- DC Power Supply – Typically 5V or 12V, depending on your load
- Load – LED or small DC motor
Circuit Diagram
Here’s a simple outline of the DC dimmer circuit using a BC547 transistor:
- Connect the collector of the BC547 to one end of the load (e.g., the positive terminal of an LED or motor).
- Connect the other end of the load to the positive terminal of the power supply.
- The emitter of the BC547 goes to the negative terminal of the power supply (ground).
- Use a 1kΩ resistor to connect the base of the BC547 to the wiper (center pin) of the 10kΩ potentiometer.
- Connect one end of the potentiometer to the positive terminal of the power supply and the other end to the ground.
How to Adjust the Dimming
By rotating the potentiometer, you can adjust the base current of the BC547 transistor. This change in base current regulates the collector current, which in turn adjusts the brightness of the LED or the speed of the motor.
- Increasing Base Current: More current flows from the collector to the emitter, resulting in higher brightness or speed.
- Decreasing Base Current: Less current flows through the transistor, dimming the LED or slowing down the motor.
Step-by-Step Instructions
- Assemble the Components: Arrange the transistor, potentiometer, and resistor on a breadboard for easy adjustments.
- Connect the Power Supply: Use a stable DC power source, such as a 5V or 12V DC adapter, depending on the load’s requirements.
- Test the Circuit: Turn the potentiometer to observe the change in brightness or speed.
Applications
- LED Dimming: Control the brightness of LED lights, especially useful for small indicator lights.
- Motor Speed Control: Adjust the speed of a small DC motor in DIY projects.
- Learning Projects: Ideal for learning how transistors and potentiometers work in practical circuits.
Important Notes
- Power Limitations: BC547 is rated for low-power applications (maximum 100mA collector current). Avoid using this circuit with high-power loads.
- Component Protection: For loads that draw more current, consider using a higher-power transistor, like a TIP120 or MOSFET, which can handle more current.
- Heat Dissipation: Although unlikely with low-power loads, a heatsink may be beneficial if you notice the transistor getting warm.
Advantages of Using BC547 in a DC Dimmer Circuit
- Simple Setup: The BC547-based dimmer circuit is straightforward and easy to assemble.
- Cost-Effective: BC547 transistors are inexpensive and widely available.
- Educational Value: This circuit provides a hands-on example of transistor-based current control, useful for learning electronics basics.
This DC dimmer circuit using the BC547 transistor offers an efficient way to adjust light brightness or motor speed in small, low-power applications.
Follow us on LinkedIn”Electrical Insights” to get the latest updates in Electrical Engineering. You can also Follow us on LinkedIn and Facebook to see our latest posts on Electrical Engineering Topics.
Worth Read Posts
#DCDimmerCircuit, #DimmerGuide, #ElectronicsBasics, #ThyristorCircuits, #DIYElectronics, #CircuitDesign, #VoltageControl, #PowerControl, #ElectronicProjects, #ElectronicsEngineering, #DCControl, #ElectronicsDIY, #PowerElectronics, #CircuitTutorial, #HomeElectronics
