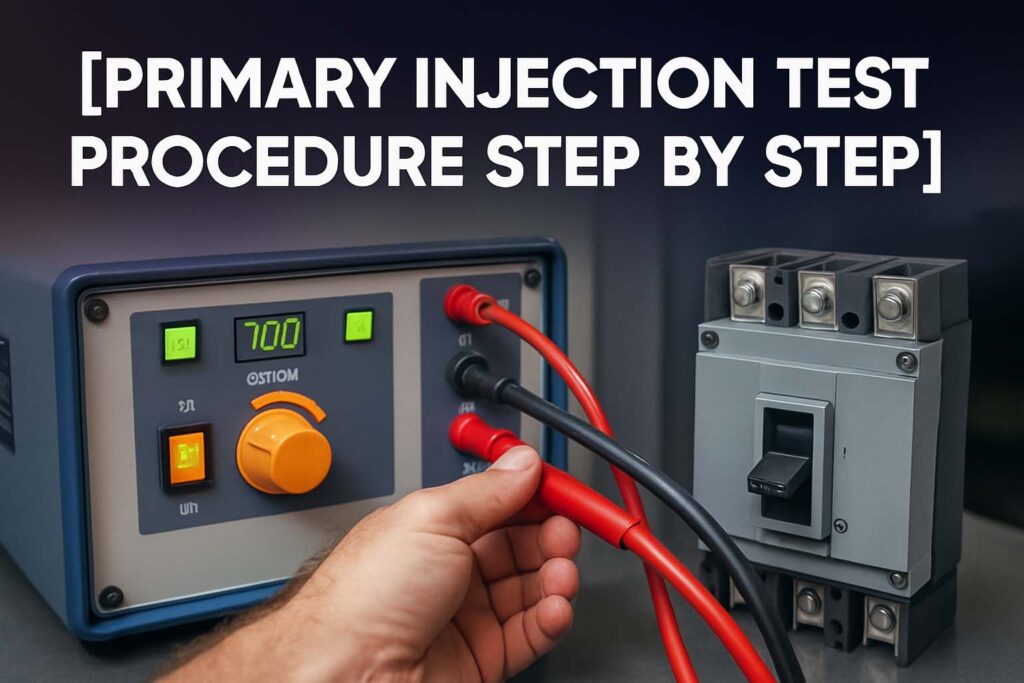
Primary Injection Test Procedure Step by Step
The Primary Injection Test procedure is a critical method used to verify the performance of electrical protection systems. It involves injecting a high current into the primary side of the equipment under test. This procedure helps validate the functioning of current transformers (CTs), protection relays, circuit breakers, and the overall wiring integrity in high-voltage systems. Whether you are testing a low-voltage breaker or a high-voltage switchgear, the primary injection test gives reliable and realistic results.

Understanding this test is crucial for electrical engineers, technicians, and maintenance professionals. This guide explains the Primary Injection Test procedure step by step, covering its purpose, tools, and execution in simple language.
What is the Primary Injection Test Procedure?
The Primary Injection Test procedure simulates real fault conditions by sending a controlled high current through the primary circuit. This process checks the calibration and operation of protection devices. It’s commonly used during the commissioning phase, after maintenance, or as part of periodic inspections.
This test validates:
- Current transformer ratios and polarities
- Trip settings of protection relays
- Coordination between circuit breakers and relays
- Contact resistance in busbars, joints, and connections
This makes it superior to secondary injection testing when evaluating the complete protection loop.
Know More about How to Use Megger Insulation Tester MIT2500
Importance of the Primary Injection Test Procedure
Why is this test important? Because in real-time fault conditions, protection relays and breakers must operate within milliseconds. If they don’t, serious equipment damage or safety hazards may occur. The Primary Injection Test procedure ensures the system reacts accurately under load.
Here are key reasons this test is vital:
- Confirms relay response to actual current values
- Validates wiring and CT connections
- Detects hidden installation or calibration errors
- Helps verify time-current coordination curves
It’s like a stress test for your protection scheme — and should never be skipped.
Primary Injection Test Equipment Required
Before starting the Primary Injection Test procedure, ensure you have the correct tools. Using low-quality or mismatched equipment can give false readings or even damage your system.
Here’s a table showing the main tools needed:
| Equipment | Description |
|---|---|
| Primary Injection Test Set | Supplies high current, adjustable per test requirements |
| Current Clamps / Probes | Measures actual current injected |
| Time Interval Meter | Measures relay/breaker operation timing |
| CTs and Relays (Under Test) | Connected to the system; operation is verified during the test |
| Safety PPE | Gloves, arc flash suit, insulated boots, face shield |
| Multimeter or Clamp Meter | For verifying continuity and current readings |
| Insulation Resistance Tester | Used before test to ensure safety and prevent arc faults |
Now let’s break down the Primary Injection Test procedure step by step.
Know More about How to Perform Dielectric Absorption Ratio Test?
Step-by-Step Primary Injection Test Procedure
1. Pre-Test Inspection
Before injecting any current, conduct a detailed inspection of the equipment.
- Visually check the system for loose terminals, rust, or broken insulation
- Confirm CTs and relays are connected properly
- Verify equipment is de-energized and grounded
- Review schematics and relay settings
Safety should always come first. Use lockout/tagout procedures before proceeding.
2. Verify Circuit Isolation
Make sure the test circuit is isolated from the main power supply. This step prevents accidental energization of the system during testing.
- Disconnect the main breaker or busbar
- Use a proving unit to confirm zero voltage
- Label all disconnections clearly
This is a critical step in preventing equipment damage or operator injury.
Know More about How to Use Megger Insulation Tester MIT320
3. Connect the Primary Injection Test Set
Now connect the test set to the primary circuit.
- Identify the correct injection point (usually the incoming terminals of the breaker or CT)
- Connect high-current leads securely to the terminals
- Ensure connections are tight and clean to minimize resistance
The test set should be rated for the maximum current required during the test.
4. Set Current and Duration
Set the desired current level on the injection set based on the CT ratio and relay/breaker settings.
- Typically, 100% to 300% of the rated current is used
- Use the relay’s time-current characteristic curve as a guide
- Select the duration long enough for tripping but short enough to avoid heating
Example:
If the relay is set to trip at 200 A, inject 250 A and record the time taken to trip.
Know More about Best Megger Insulation Tester 10kV
5. Perform the Injection Test
With all safety checks in place, begin the injection.
- Start the test set and gradually increase the current to the desired level
- Monitor the current on both injection set and clamp meter
- Record the tripping time from current injection to relay or breaker operation
Repeat the test a few times to confirm consistency.
6. Analyze the Results
After the test, evaluate the performance:
- Did the relay trip within the expected time window?
- Were current levels accurately achieved and measured?
- Did any wiring or component show abnormal heating?
Compare the measured tripping time with the manufacturer’s time-current curves.
Know More about How Does a Megger Insulation Tester Work
Use a table like below for clarity:
| Parameter | Measured Value | Expected Value | Result |
|---|---|---|---|
| Injection Current (A) | 250 | 250 | Pass |
| Trip Time (ms) | 320 | 300 – 400 | Pass |
| Contact Resistance (mΩ) | 0.4 | ≤ 0.5 | Pass |
| Relay Function | Tripped | Tripped | Pass |
If results fall outside the expected range, re-check settings or investigate wiring issues.
7. Disconnect and Restore
Once tests are complete:
- Switch off the test set
- Allow cables to cool down
- Remove test leads carefully
- Reconnect the system to its normal configuration
- Remove grounding and safety locks
Finally, energize the system and monitor it for stability.
Best Practices During Primary Injection Test Procedure
To ensure success and safety, follow these expert tips:
- Always use properly rated test equipment
- Perform insulation resistance test before injecting high current
- Keep a record of all test values and photos of setup
- Avoid using long or thin cables, which cause voltage drops
- Use two operators – one to control injection and one to observe tripping
Proper planning and preparation make the test more efficient and accurate.
Common Challenges in Primary Injection Test Procedure
Even experienced technicians can run into issues:
- Breaker not tripping due to incorrect relay settings
- High contact resistance at connections affecting current flow
- Loose or oxidized terminals causing voltage drops
- Mismatched CT polarity leading to faulty test results
Troubleshooting requires methodical thinking and reviewing all parameters one by one.
When Should You Perform Primary Injection Test?
Primary injection testing is recommended during:
- Commissioning of new switchgear
- After replacing or adjusting protection relays
- Periodic maintenance every 3 to 5 years
- After major electrical faults or repairs
Skipping this test can lead to undetected faults, resulting in equipment failure.
Conclusion: Why Primary Injection Test Procedure Matters
The Primary Injection Test procedure is more than just a checklist. It ensures that your protection system will respond during actual fault conditions. It reveals weaknesses in wiring, CT calibration, relay logic, and breaker response that other tests might miss.
When performed correctly, this test improves the reliability, safety, and compliance of your electrical system. It’s a non-negotiable step for high-performance electrical installations, substations, industrial panels, and mission-critical facilities.
Never underestimate the value of thorough testing. Whether you’re an engineer, technician, or supervisor, mastering the Primary Injection Test procedure step by step can help you prevent failure, save costs, and maintain safe operations.
Follow Us on Social:
Subscribe our Newsletter on Electrical Insights for latest updates from Electrical Engineering Hub
#PrimaryInjectionTest, #ElectricalTesting, #PowerSystemProtection, #TestingProcedure, #ElectricalEngineering, #InjectionTesting, #RelayTesting, #HighCurrentTest, #SubstationMaintenance, #ProtectionRelayTest, #SwitchgearTesting, #StepByStepGuide, #HVTesting, #ElectricalSafety, #TechnicalProcedure


